I know how annoying it can be going through all of your eyeshadows or look for a specific one. Arranging your eyeshadow can save so much time and what better way than categorizing and arranging them your way. Plus, it can be fun..
Now, the palettes available in Mac carry only 15 eyeshadows, I'll be showing you how you can fit 21 or even 26 in one palette.
You can also save up money by buying the eyeshadow pro refill which is cheaper than the regular eyeshadows, In addition they come with magnates which makes it easier to place in the palette.
Now, the down side is you can't always find the shade you want in refills, if you don't there is a way. You can detach the shadow and place it in the palette.
So here are the steps:
That's how the palette looks.
what you have to do is remove the plastic cover that eliminates the amount of shadow you can place.
Unfortunately I already had mine removed.
All you have to do is lift the plastic definer, place a knife under it and pull it off.
Please make sure to be as careful as you can.
what I do after removing the plastic piece I glue the magnet so it stays in place. You can now easily place your refill eyeshadows.
Here's how you can transform your regular eyeshadow:
Here's what you need:
Your Mac pro palette.
The eyeshadow/s you want to transform.
Cutter.
Scissor.
Lighter.
Permanent Marker.
Double sided tape.
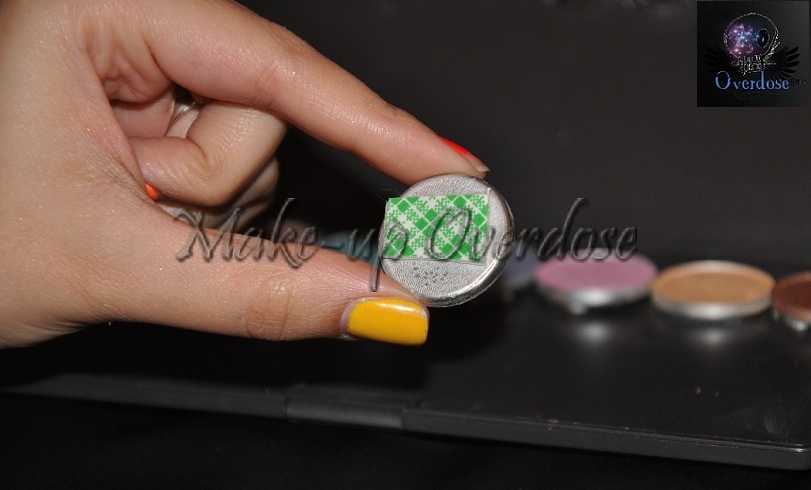
Place the cutter on the edge of the shadow and pull it upwards to separate the piece containing the shadow from the case.
(please excuse my shipped nails. I have manicures on a weekly bases, the brand of nail polish I happened to use, which is Sephora, is so bad that it chipped within 2 days. )
secure the eyeshadow with a scissor. Make sure you get a firm hold of it. (not too firm though, I don't want you breaking it)
Pleas try to be as careful as you can with this step. After securing the eyeshadow with the scissor lit your lighter and start burning the lower part. What the fire would do is melt the glue holding the shadow which will make it easier for you to pull the eyeshadow out.
Move the lighter in a circular motion for 10 seconds. Don't over burn it
once done with melting the glue. Grab you cutter once again and try to gently remove the eyeshadow. Be as gentle as you can for you can easily break your eyeshadow. Be careful not to burn your hands as the eyeshadow will still be hot. Lift the eyeshadow and place it on a flat surface to cool down for a minute. If you find difficulty in removing the eyeshadow it might be because the glue is not melted. Repeat the step.
Doing this step might be slightly difficult at first but once you get a hold of it, it'll get easier.
Once the eyeshadow has cooled off grab you double sided tape and stick a small piece on the backside of your shadow then place it on the palette. Viola..
Another hint, you can also use magnets instead of double sided tape. I never found the right size.
This step is optional. I came up with a way of organizing my palette. The refill ones come with a label on the back but the ones you'll stick obviously don't. What I do is I number each row and place each shadow's label accordingly.
Some people don't mind having them all mixed up or have their own way of remembering. In this case you can fit up to 26 eyeshadows in one palette.
Please excuse how messy my palette looks. It's so hard to keep it tidy as the excess powder gets all over the place =)
I separate my mattes from my shimmers. You can do yours the way you desire.
Don't throw away the cases. Save them up, and as MAC recycles for each 6 cases you get any lipstick of your choice for free.
Any case from MAC will do lipsticks, eyelash containers, Blusher,....
Hope you found this post useful, and hope you enjoyed it.
Got any questions don't hesitate to leave a comment...
I'll be starting giveaways as of next month, my first will be one of my must have make-up tools that I absolutely love and can't stop raving about, which is the infamous Beauty Blender..
All you have to do is follow my blog.
Stay tuned...
xoxo